

Getting Started
The platform brings appraisal operations, property research, mapping, comparables, files, and report output into one connected workspace. These docs help appraisal teams understand the product and help technical teams work with the API and portal tools.
Use this page when you are learning the application, onboarding a team, or deciding where a workflow should live.
What The Platform Organizes
Section titled “What The Platform Organizes”The workspace is built around the records appraisal teams already use:
| Area | What it handles |
|---|---|
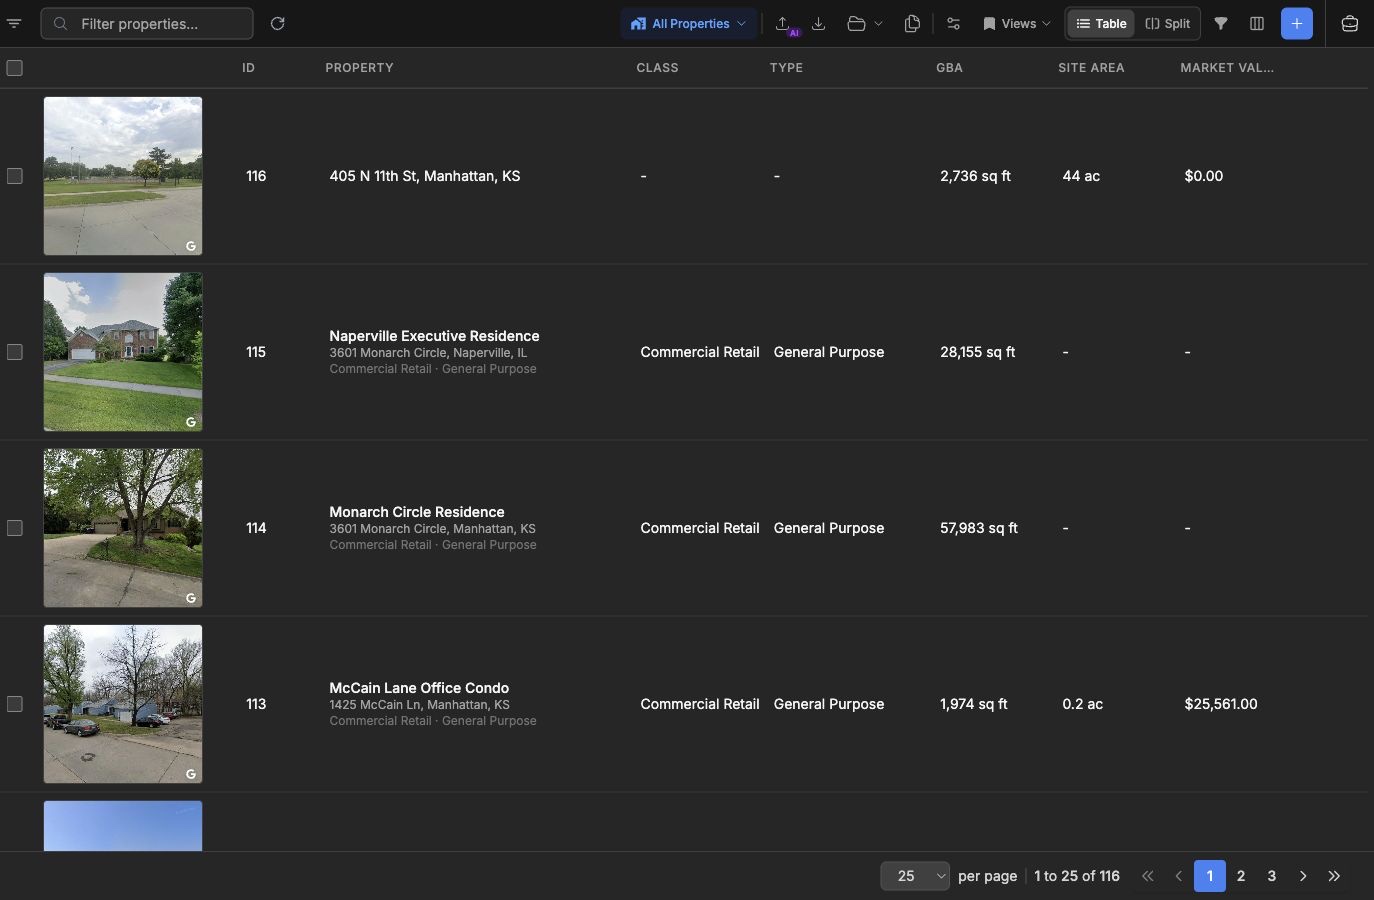
| Properties | Subject and market property records, parcel/location data, Property Use Classification System (PUCS) taxonomy, photos, and documents. |
| Comparables | Sale, lease, income/expense, and cost evidence connected to property records. |
| Rent Rolls | Dated unit-mix, occupancy, and rent snapshots connected to properties. |
| Bids | Prospective work, client requests, fees, timelines, and bid-to-assignment conversion. |
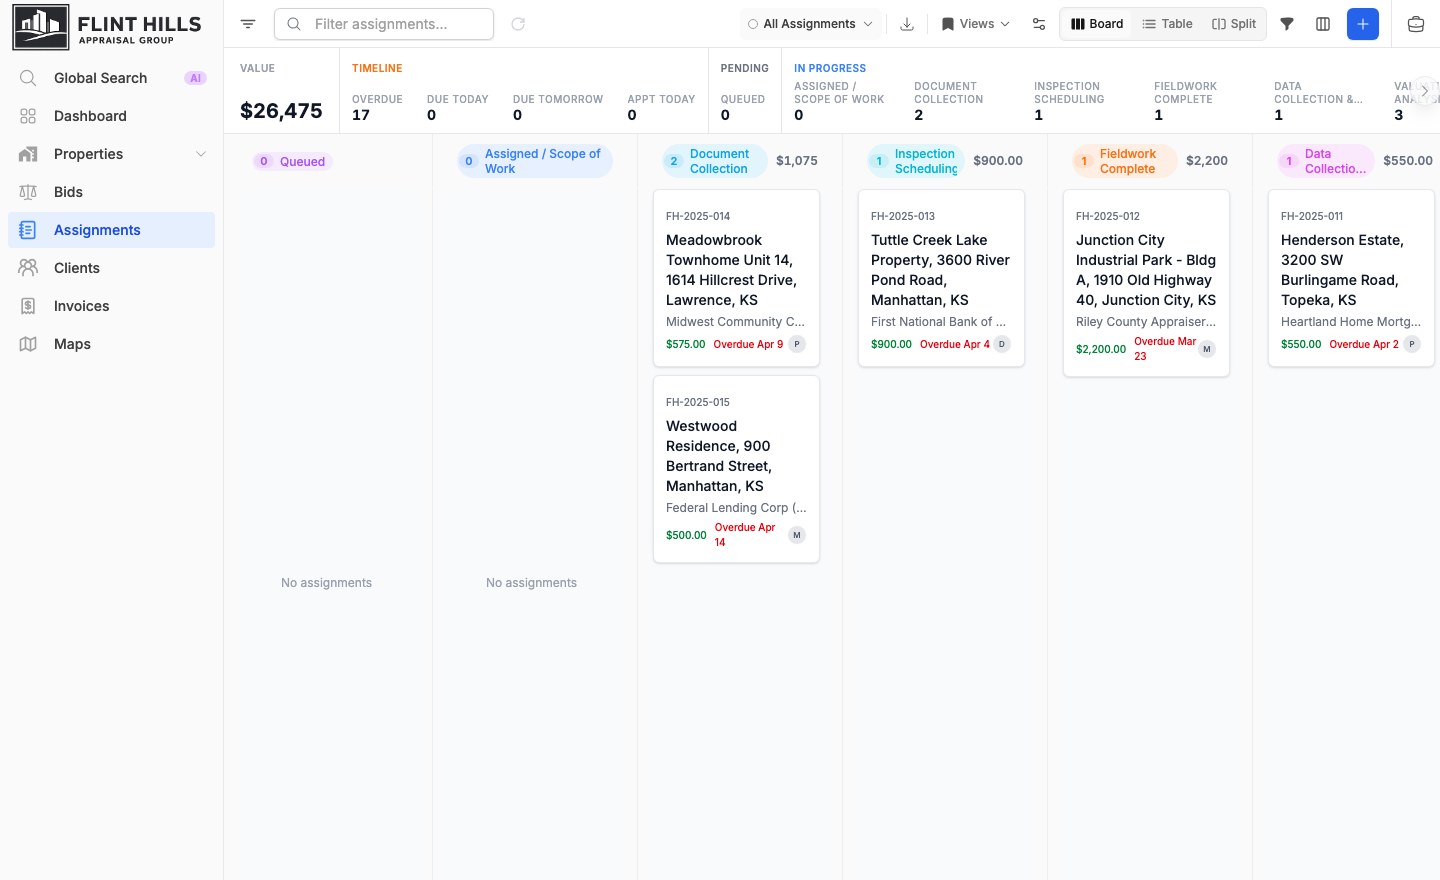
| Assignments | Active appraisal work with subjects, clients, assignees, deadlines, methodology, values, comps, and files. |
| Clients | Organizations, contacts, portal access, and accounting links. |
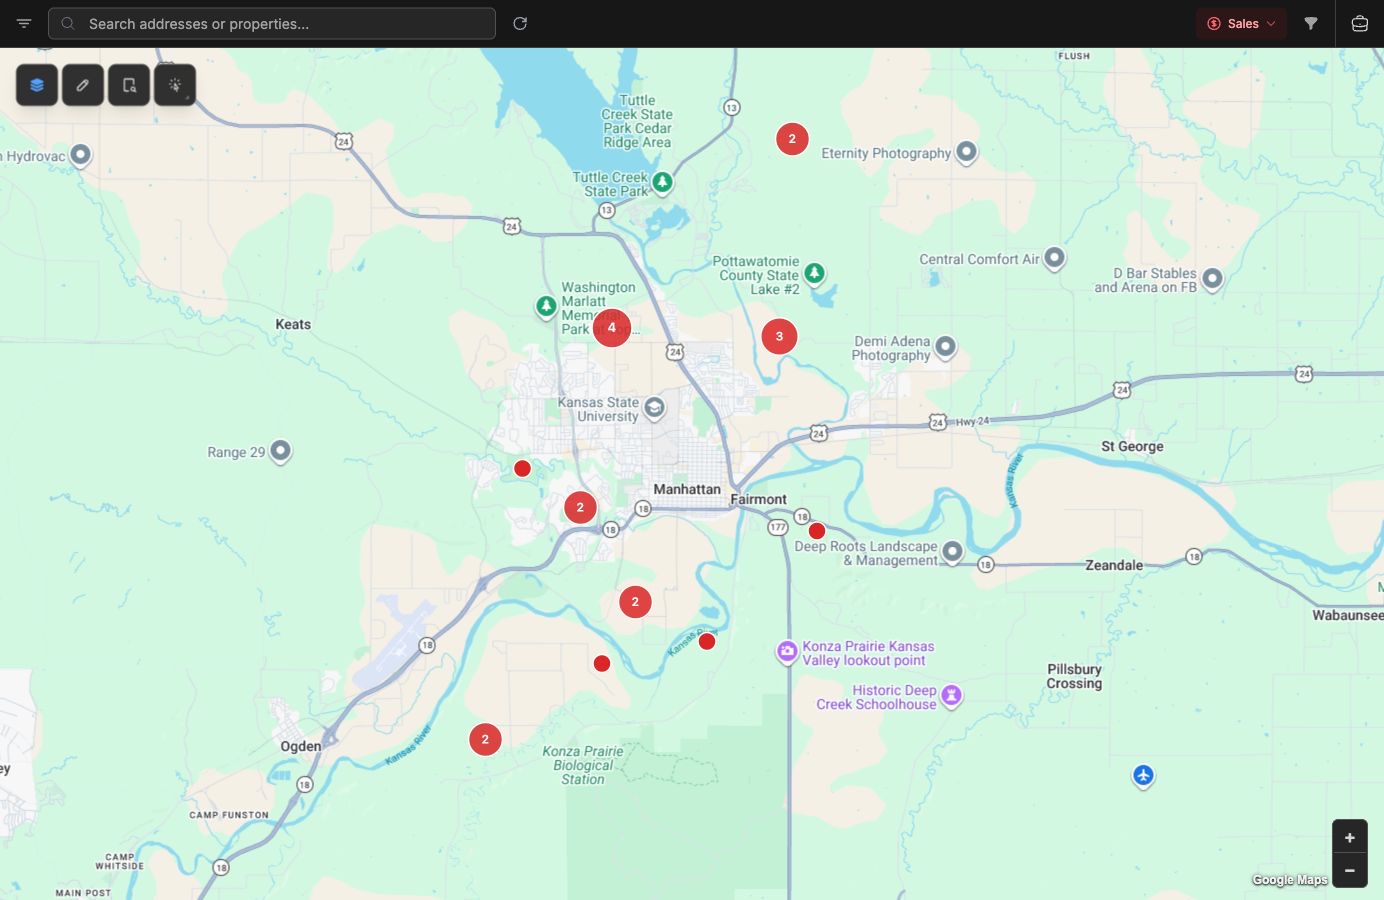
| Maps | Location review, parcel context, overlays, clustering, and map-based filters. |
| Files | Photos, PDFs, spreadsheets, report exhibits, and supporting workpapers attached to records. |
PUCS is a three-level taxonomy for describing how a property is used. It organizes classifications from broad classes into types and more specific subtypes.
How Teams Work
Section titled “How Teams Work”Most teams move through the same high-level flow:
- Capture an incoming request as a bid or assignment.
- Scope the engagement, confirm fee and due date, and assign the work.
- Build or select the subject property record.
- Research comparable data in table, split, and map views.
- Attach workpapers, photos, maps, and supporting files.
- Populate report templates with assignment and comparable data.
- Close out the job with invoicing or accounting sync when enabled.
Common Workspaces
Section titled “Common Workspaces”The application uses consistent workspace patterns across record types:
- Table views for search, sorting, saved views, exports, and bulk review.
- Board views for pipeline and workflow management.
- Split views for reviewing a table beside mapped locations.
- Map views for geographic analysis, parcels, overlays, and nearby records.
- Detail pages for editing structured fields, related files, comments, links, and system information.
Permissions, organization settings, and enabled integrations determine which actions are available in your workspace.
First Workspace Setup
Section titled “First Workspace Setup”This guide walks through the first useful setup path for a new workspace: add the people and client context, create property records, start an assignment, and connect the supporting research.
Some setup actions require owner, admin, or manager permissions. If you do not see an action mentioned here, ask a workspace administrator to confirm your role and enabled features.
1. Open Your Workspace
Section titled “1. Open Your Workspace”Sign in from your organization’s application URL and choose the workspace you want to use. The main navigation gives you access to Properties, Bids, Assignments, Clients, Invoices, Maps, and global search.
Start by confirming that you can open:
- Properties for subject and market records.
- Assignments for active appraisal jobs.
- Clients for organizations and contacts.
- Maps for location-first review.
2. Add Team Access
Section titled “2. Add Team Access”Owners and admins should invite the team members who need access, then assign roles that match their responsibilities. Common roles include owner, admin, manager, appraiser, and viewer.
Use tighter roles for users who only need to review data. If your organization uses confidential or restricted records, confirm which roles can see sensitive fields before adding production assignments.
3. Add Clients And Contacts
Section titled “3. Add Clients And Contacts”Open Clients and add the organizations and people involved in incoming work: lenders, borrowers, brokers, reviewers, attorneys, agencies, or internal stakeholders.
Client records can be reused across bids, assignments, invoices, and portal workflows. Keeping organizations and contacts clean early makes bid requests, assignment creation, and accounting sync easier later.

4. Build The Property Record
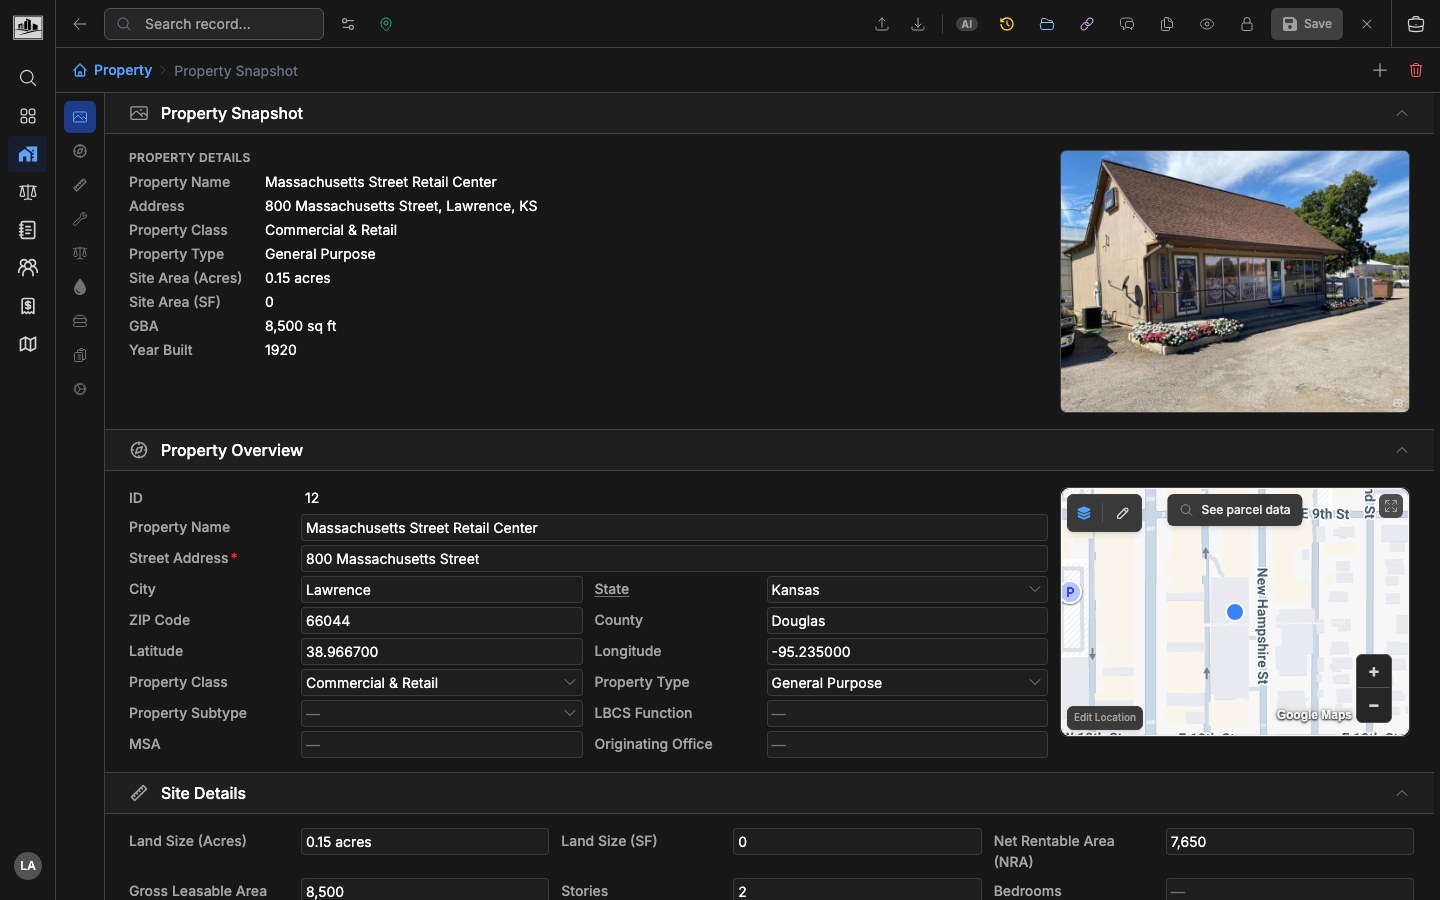
Section titled “4. Build The Property Record”Open Properties and create the subject property or import existing property data. At minimum, capture the address, property name, class/type, and location. Add parcel, site, building, valuation, ownership, and notes as those details become available.
Use the property detail page to review structured fields, map context, and related files in one place.
5. Create The First Assignment
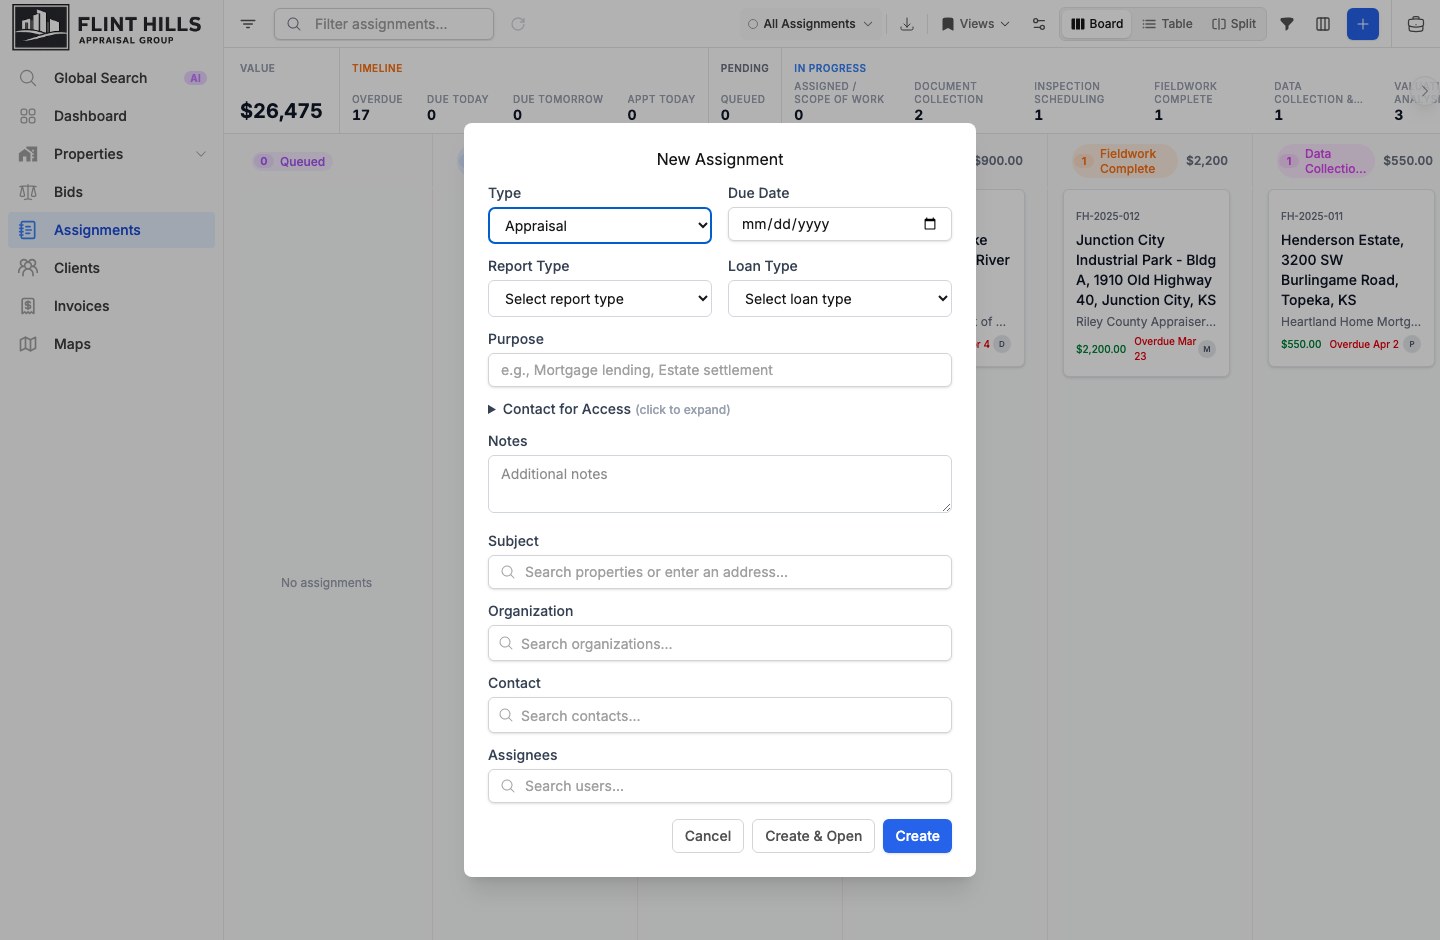
Section titled “5. Create The First Assignment”Open Assignments and select Add Assignment. Enter the assignment type, due date, report or loan details when applicable, purpose, subject property, client organization/contact, and assignees.
Use Create & Open when you want to continue filling out valuation, methodology, administrative, notes, and comparable sections immediately.
6. Research Comparables And Map Context
Section titled “6. Research Comparables And Map Context”Use the property database and comparable views to find relevant sale, lease, income/expense, or cost evidence. Table views are best for sorting and filtering records. Split and map views are best when distance, parcels, access, flood zones, or other geographic context matters.
When your review depends on property type, use the PUCS hierarchy in the Property Type Filter. PUCS selections carry through property-related workflows, including comparable review.
7. Attach Files And Photos
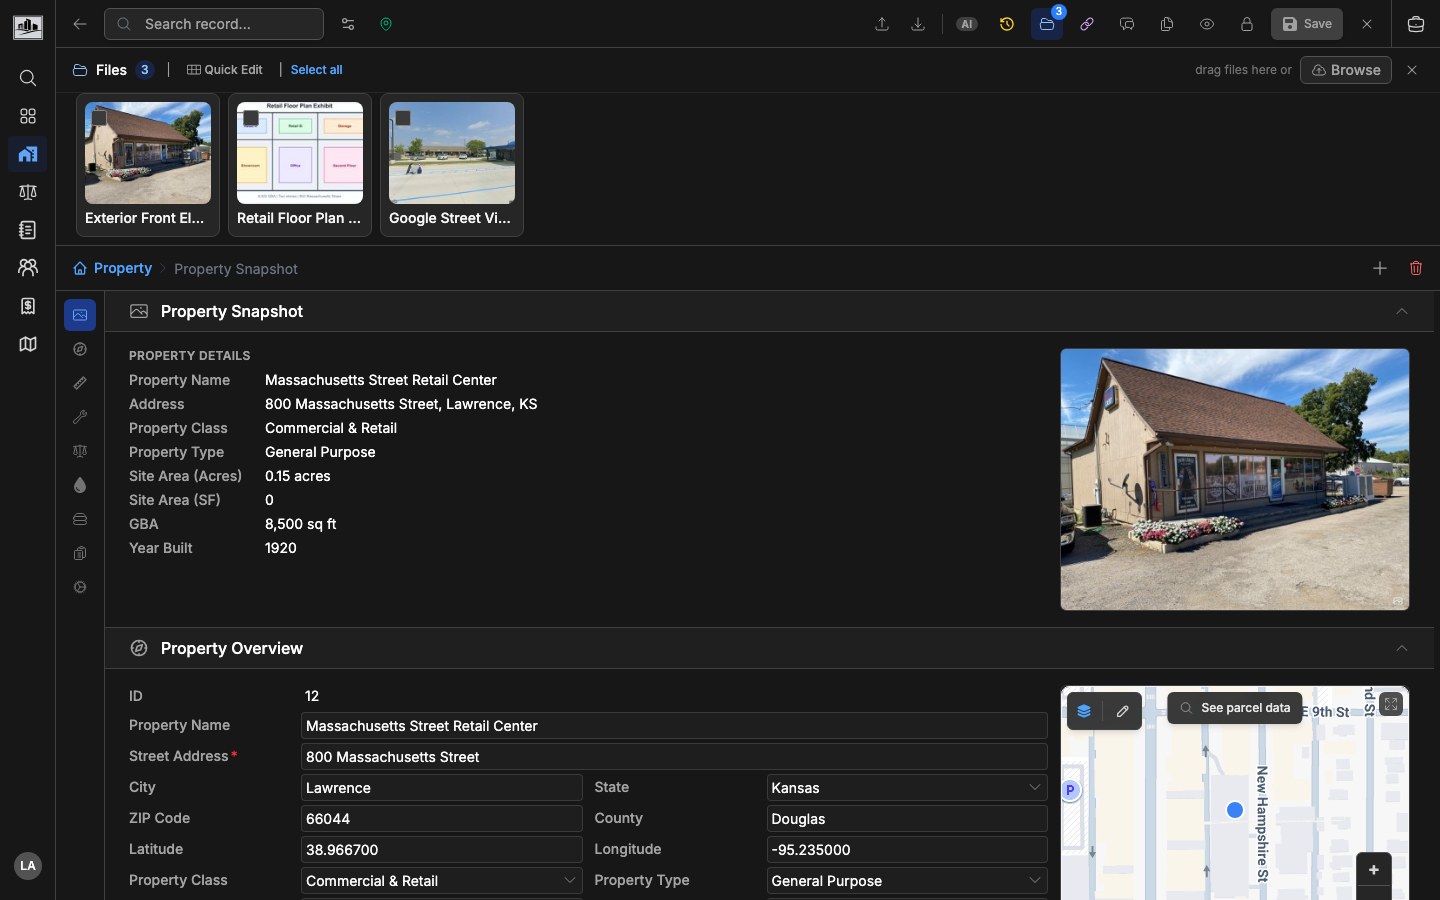
Section titled “7. Attach Files And Photos”Open a property or assignment and use the file drawer to upload supporting documents, inspection photos, maps, exhibits, leases, rent rolls, spreadsheets, or report drafts.
Files stay attached to their source record and can be previewed, downloaded, renamed, organized, and used by report workflows.
8. Connect Reporting And Integrations
Section titled “8. Connect Reporting And Integrations”When enabled, use the Office Add-in to insert assignment fields, comparable tables, media, and maps into Word or Excel templates. If your organization uses accounting integrations, connect client and invoice workflows to QuickBooks or Xero. If you are integrating another system, start with API authentication and the published API Explorer.
First-Week Checklist
Section titled “First-Week Checklist”- Invite the production team and confirm roles.
- Add the most common client organizations and contacts.
- Create or import a small set of subject and market properties.
- Create one test assignment and move it through the workflow board.
- Attach sample files and photos to the assignment or subject property.
- Review the same records in table, split, and map views.
- Confirm report-template and accounting workflows if those features are enabled.
Next Steps
Section titled “Next Steps”- Assignments & Workflow explains production tracking.
- Property Database covers property records and PUCS classification.
- Comparable Analysis covers sale, lease, income/expense, and cost evidence.
- Interactive Mapping covers map search, layers, and filters.
- Office Add-in covers Word and Excel report workflows.
Screenshots in these docs use sample data. Your workspace may show different fields, labels, views, and actions depending on your role and organization configuration.